Until I turn around....
All right, well, that's just my morning funny for you.... Back to my regularly scheduled sewing. ;)
Sometimes I decide to clean up the mess that is our house. With seven people living here and my creative tendencies, it always tends to look a little we also house a Tasmanian devil. Last week while I was picking up our living room J decided he was going to help me out. He has always been obsessed with the vacuum cleaner and as soon as he was big enough to move it he was asking me if he could vac-key-uum. So on friday when I was picking up he told me he was going to clean up all the toys so that he could vac-key-uum. As a mom, I'm like FANTASTIC!! :) 
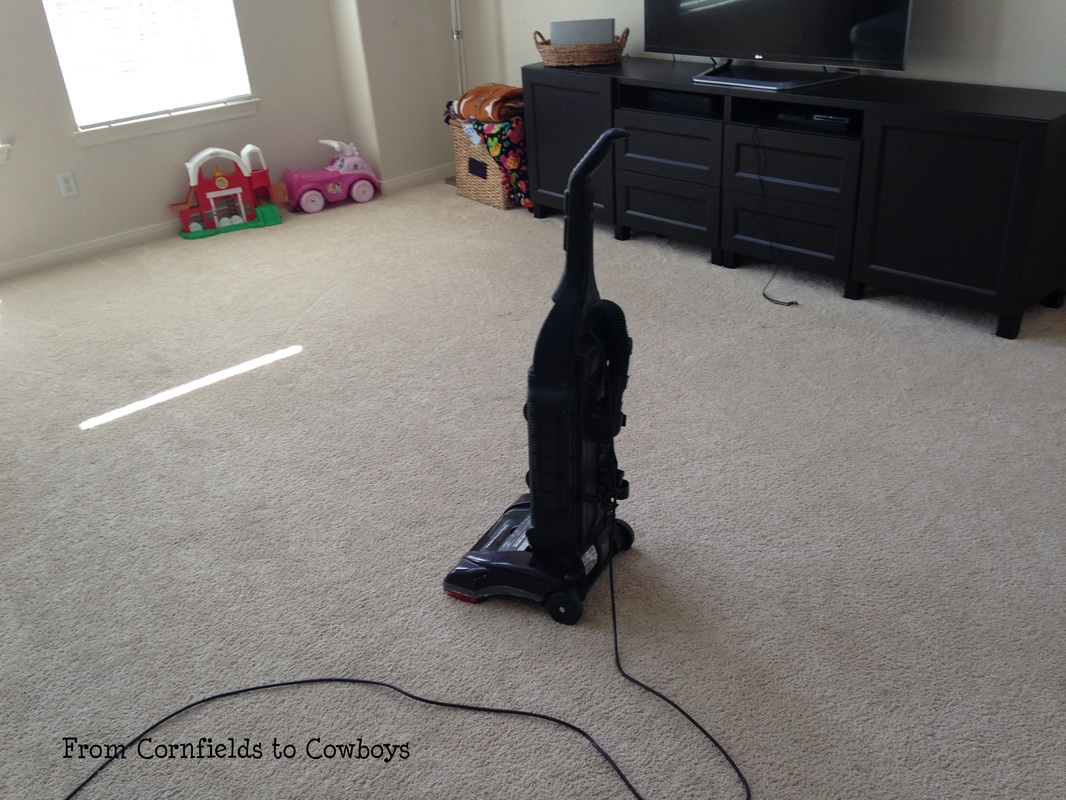
Look at that!! He did a fantastic job. He moved everything that was in his way and got all of the carpet. <3 The vacuum is bigger than him and he was still able to get it all clean.... Until I turn around.... 
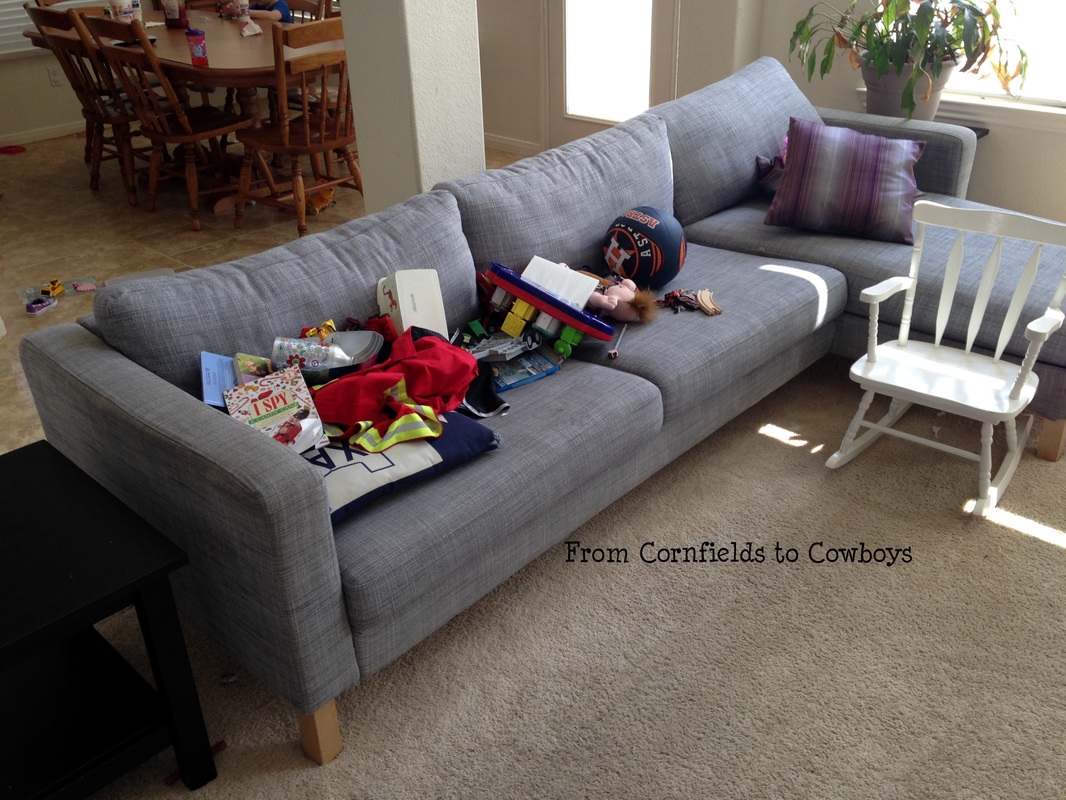
BAHAHAHAHA! He just chucked everything onto the couch. Aw well, the carpet is clean and now everything is together and it makes it easier to sort out and put away. Luck for me, Nick went ahead and cleaned off the couch! So either way, I didn't have to do it. Score in the momma book!
All right, well, that's just my morning funny for you.... Back to my regularly scheduled sewing. ;)
0 Comments
Recently I stretched my sewing abilities and created a tiny backpack that we are now using as a diaper bag for Reese. I saw one that another Mama made on facebook and knew I just HAD to try it out. Thankfully she told me which pattern to use and I got right to work! The bag is the Tiny Explorer Backpack from Diedel*Bug Handmade. Excuse my toes. LOL! I couldn't crop them out without taking some of the pieces out of the picture. This thing has a TON of pieces. It is not for the faint of heart. IF I had looked closer at the pattern, I would have seen that the pattern also gave measurements for just cutting the rectangle/square pieces with a ruler and rotary cutter. WAY better option. Saves paper, time, and FABRIC! All of the white, non-paper pieces that you see are different fusible interfacings, to give the bag its structure. So once everything is ironed together, it is a lot less intimidating. This pattern is NOT for a beginner. It uses piping (which I learned to use on the fly, use your zipper foot), has two zippers, and requires a creative use of your imagination for how to put it together because the instructions are not overly extensive. I fussy cut these straps so that I could have one with Anna and one with Elsa on it. I wish I would have realized that I cut one triangle with Anna and I should have had one with Elsa too but that is neither here nor there. Making these straps is the first set of steps. I had never worked with piping before so I ended up making the Anna strap twice because they were very different sizes. But seriously, how cute are those things?! Next the front came together. I had to fake it with this front pocket. Like I mentioned before, the instructions are NOT super in depth and I didn't sew the lining on initially...so I faked it. YAY for no one (except all of you) ever knowing the difference. Beautiful lining and interior zipper pocket. Love having extra storage, or places for binkies!! It took some serious debate and a facebook poll to decide where to put her name on the bag but in the end, I decided on the pocket. This beautiful embroidery was done by The Freckled Clover, she does FANTASTIC work. Seriously, click her name and "like" her shop. You will want to buy ALL the stuffs!! I had been praying that I would find someone local who could do this kind of thing for me and by total chance (or facebook) this shop fell into my lap AND she's right in my neighborhood! Yay for answered prayers! (If you're in the Sullivan area, I have an awesome gal there too but the mail back and forth is just too much!!)
Do not be fooled by the name "tiny" in the product name. It is no tiny backpack. It would be the perfect size to use as a purse, or for a preschool or kinder backpack. It is wide enough that you could put a box of baby wipes inside of it comfortably with wipes, clothes and all the extras. Plus the elastic pockets on the side are perfect for snacks and water bottles. It also comfortably holds a folder. And the straps are long enough that I can extend them out so that I can wear it but not so long that its awkward for J to wear it when I need him to! What do you think? Should I add this to my up and coming shop?? I SWEAR the shop is coming! :) I WILL be making more of this bag, especially now that I have all the details worked out. I know I promised this post a week or more ago but we all know I am a procrastinator. HA! This is a Create Kids Couture Porters button up shirt. (Pattern available here)It is also the fourth one I have made. I made a Batman version for J and two Planes versions as a gift for a precious little friend. Our family went to see Guardians of the Galaxy on Nick's birthday and we were all immediately hooked! Its a fabulous movie and I am not a huge movie fan. I would even go see it a second time in the theatre. For me, that is saying a LOT because I really do not enjoy going to the movie theatre. Anyhow, we decided that Mike's birthday theme was going to be GOTG. First I made the I am Groot shirt (see previous post) and then onto this button up. I found the fabulous space fabric at Joann Fabrics and it was on sale. I matched it with Kona black for the sleeves and pockets. Next up was getting the screen printing on to show the characters. I used the freezer stenciling method. I wish I could claim to have draw everyone out but I'd be fibbing to you. I totally traced them. My hand and brain do not communicate when it comes to drawing. You can see, Rocket, Mikes favorite character, took the main spot on his breast pocket. I am not 100% sure that I love how it looks but I think it is because I didn't give Rocket a gun, which he is nearly always carrying. I just was not sure that that would be school OK, even if it was just a shadow, so I left that part off. Gamora, Drax, Star Lord, and Groot made their appearance along the hemline of the front of the shirt. I am super thrilled with how those look. Mike was totally stoked and wore this on the first day of school. (You can see pics of it in action here.)
As always, CKC delivers an easy to understand and simple pattern. I'd be lying if I didn't tell you that the collar gave me FITS. Fits I tell you!! But through no error of the pattern. I actually have made 4 shirts but about 10 collars. LOL! I am so used to matching everything up perfectly that I didn't know how to "ease" the collar on. But I have got it on now. What is ease you ask? It is the art of carefully and gently shifting the fabrics back and forth until you get the perfect fit. I found that with just a little bit of pushing and pulling, the collar would go right on! Overall, I love this pattern. I seriously have a love affair with CKC, I mean they did reinspire my love of sewing. I would give it a high beginner to intermediate rating because of the button holes and collar but even as a beginner, beginner, someone could master it, thanks to the amazing writers at CKC. (Can you believe they don't pay me to write reviews like this?!) As always, if you like what you see and cannot or do not want to make it yourself...I would LOVE to make one for you! Just let me know! |
AuthorWelcome! I am Mandie, a 30-something (ah!) wife and mother of 5. I am claiming this as my families little spot on the internet. Tag along as we adjust to life in the south, learn to have TWO self employed parents, and experiment with all things crafty and crazy! I am 100% sure that it won't always be pretty but it will always be real! I hope that you are blessed with some laughter or some camaraderie as you read! Archives
March 2017
Categories |